You’ve got your date, booked the venue, and you’re getting excited about your wedding, but first, we have to get the guests there!
Sending out save the dates and invitations can be overwhelming, trust me, I’ve been there. I want to make the process easy because you have enough to worry about!
Why send a Save the Date?
These are sent out many months before your wedding. A Save the Date informs your guests that there’s a wedding happening and that they are going to be formally invited, allowing them to plan appropriately. People are busy these days and it’s always a good idea to give people a heads up – especially if there is travel involved!
They can be as simple as a single flat card in an envelope or include things like magnets or little gifts. It’s your wedding, you do you!
What to include on a Save the Date
DO: Include your names, date, and city where the wedding is. Venue is generally not included on a Save the Date.
DO: Include a note that there will be a formal invitation to follow.
OPTIONAL: Include your wedding website if you have it set up.
OPTIONAL: Include any helpful information for people planning to attend. If there is substantial travel, adding a little note about that might be helpful.
DON’T: Send them to people who are not on your invite list.
DON’T: Include information about your registry. If they want to give you a gift, they can ask, or you can include that information on your website.
DON’T: Ask them to RSVP – that’s for the invitation only.
Timeline
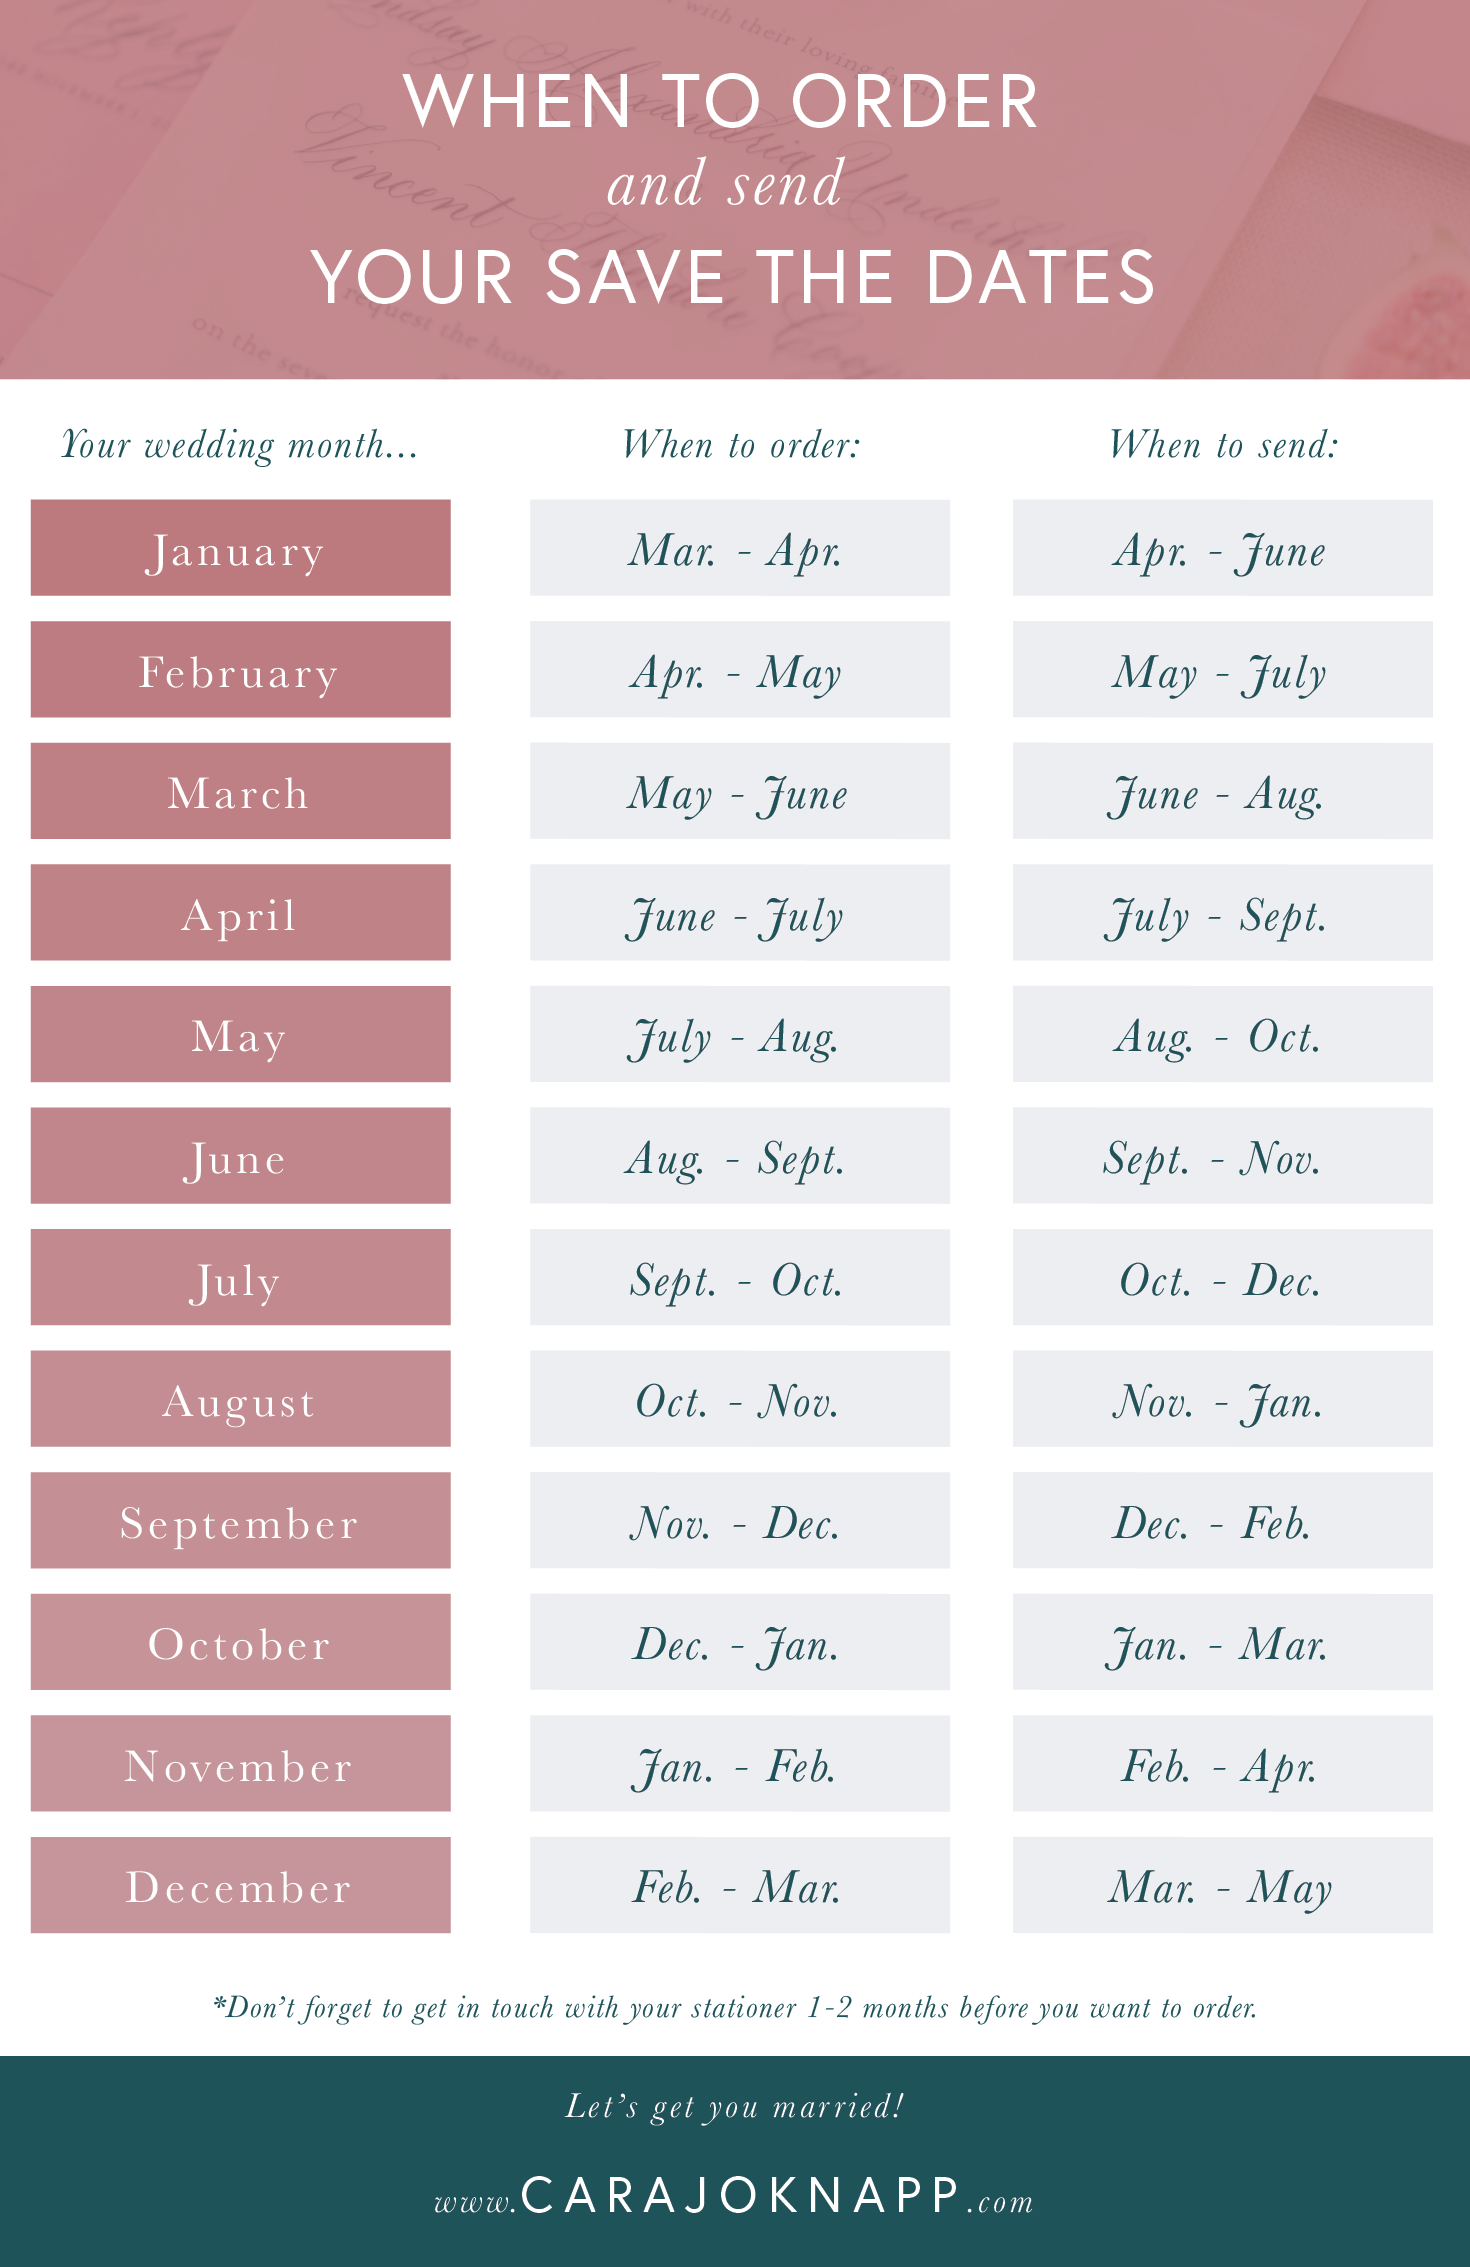
Send your Save the Dates 6-8 months in advance of your wedding. 8-10 if over 50% of your guests are traveling to the destination, or it is on a holiday weekend.
Begin working with your stationery designer 2-3 months before you need to send them out. This will allow enough time for design, printing, addressing and assembly.

